xcodelovers
Just Sharing Knowledge
Tutorial accessing video with Code::Blocks and OpenCV
Posted by on February 4, 2011
In this tutorial, we will learn how to access video (ex. web camera) and display it on screen with Code::Blocks and OpenCV for video pre-processing in computer vision project.
Ok, lets jump to tutorial step:
- We assume that your computer already has Code::Blocks and OpenCV installed. Obviously, both have been integrated well. If not, please see my earlier tutorial associated with them on this blog.
- Run Code::Blocks and create new C/C++ project.
- On the main.cpp put this code:
#include "stdio.h" #include "cv.h" #include "highgui.h" int main( int argc, char **argv ) { CvCapture *capture = 0; IplImage *frame = 0; int key = 0; /* initialize camera */ capture = cvCaptureFromCAM( 0 ); /* always check */ if ( !capture ) { fprintf( stderr, "Cannot open initialize webcam!\n" ); return 1; } /* create a window for the video */ cvNamedWindow( "result", CV_WINDOW_AUTOSIZE ); while(true) { /* get a frame */ frame = cvQueryFrame( capture ); /* always check */ if(!frame ) break; /* display current frame */ cvShowImage( "result", frame ); /* exit if user press 'Esc' */ key = cvWaitKey( 20 ); if((char)key==27 ) break; } /* free memory */ cvReleaseCapture( &capture ); cvDestroyWindow( "result" ); return 0; } - Then build and run project by press “F9”. You can see the result….:D
Tutorial integrating Code::Blocks and OpenCV 2.2.0
Posted by on February 4, 2011
In this tutorial, we will learn about “how to integrate Code::Blocks and OpenCV 2.2.0”. The installation step of OpenCV 2.2.0 similar like OpenCV 2.1.0 but different in setting of OpenCV include directory or files and OpenCV library files. Please see my previous tutorial about “Tutorial integrating Code::Blocks and OpenCV 2.1.0”.
Ok, lets jump to the tutorial step.
- We assume that you have installed opencv and codeblocks on your computer. If you don’t have it, please see my other tutorial how to installing them in this blog. Go to the next step.
- Run Code::Blocks and select on the menu “Setting->Compiler and debugger” like image below.
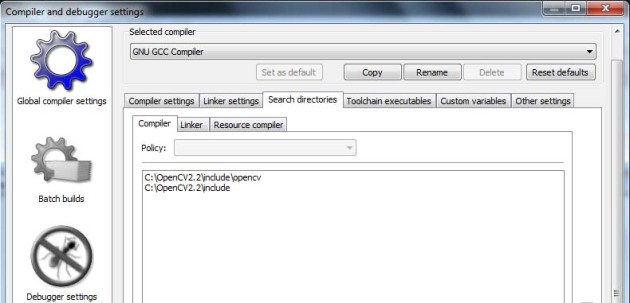
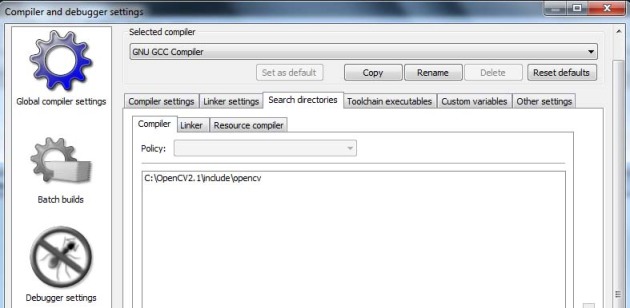
- Next, you will see a dialog for Compiler and debugger settings like image below, on the “search directories” tab select “compiler” tab and add opencv include directory by click “Add” button on the bottom.
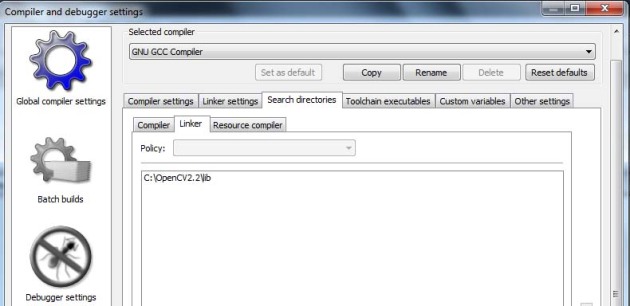
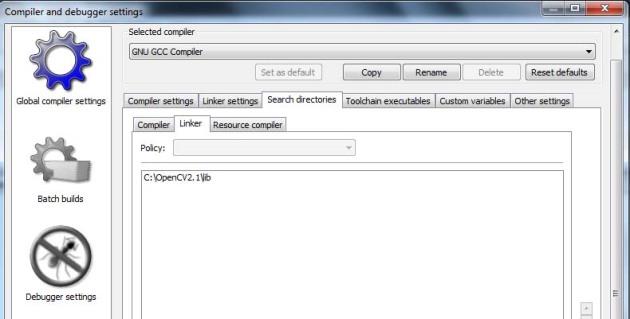
- Next, On the “search directories” tab select “linker” tab and add opencv library directory by click “Add” button on the bottom like image below.
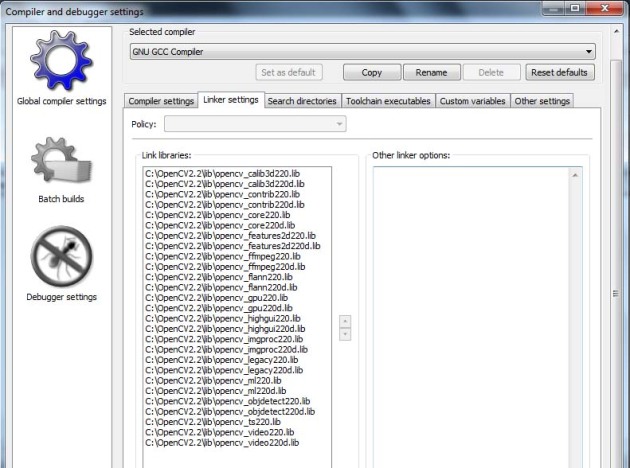
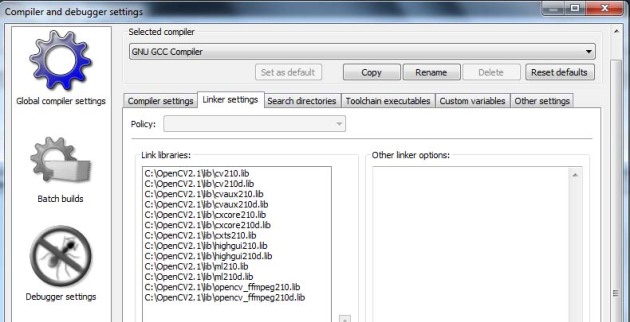
- Next, still on a dialog for Compiler and debugger settings, select “Linker setting” tab and add opencv include file by click “Add” button on the bottom like image below.
- Create New project from menu “File->New->Project”, select “Console Application”, choose C++ project and give project name. Select “GNU GCC Compiler” and click “Finish” button.
- On the left panel expand folder “src” and then open main.cpp. On the code editor put this code bellow.
#include #include "cv.h" #include "highgui.h" int main(int argc, char** argv) { IplImage *img = cvLoadImage("lena.jpg", CV_LOAD_IMAGE_COLOR); /* initialize font and add text */ CvFont font; cvInitFont(&font, CV_FONT_HERSHEY_SIMPLEX, 1.0, 1.0, 0, 1, CV_AA); cvPutText(img, "Hello World!", cvPoint(10, 50), &font, cvScalar(255, 255, 255, 0)); /* display the image */ cvNamedWindow("image", CV_WINDOW_AUTOSIZE); cvShowImage("image", img); cvWaitKey(0); cvDestroyWindow("image"); cvReleaseImage( &img ); return 0; } - Build and run project by press “F9”. (Note: you must put image file on the project folder first and then run project.)
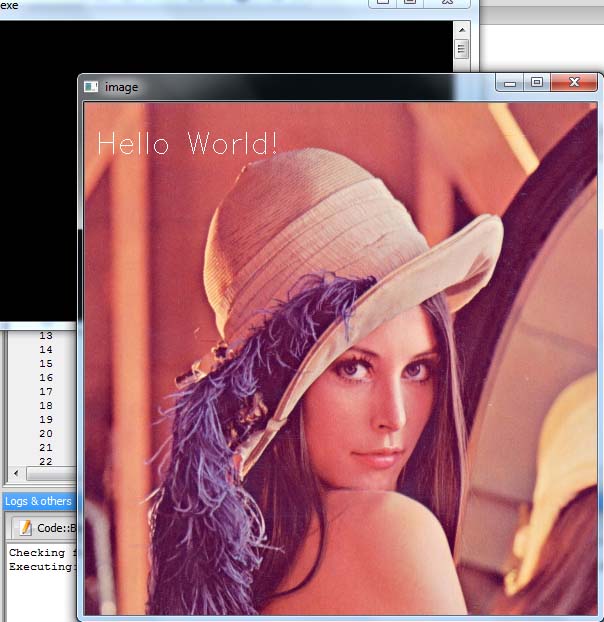
- Then you will see result like image below. Congratulation you are successful integrate Code::Blocks and OpenCV. Have fun…
Tutorial integrating Code::Blocks and OpenCV 2.1.0
Posted by on February 3, 2011
In this tutorial, we will learn about “how to integrate Code::Blocks and OpenCV 2.1.0”. For OpenCV 2.2.0, please see my other tutorial about “Tutorial integrating Code::Blocks and OpenCV 2.2.0”.
You must have OpenCV 2.1.0 and Code::Blocks installed on your system. If you don’t have it, please see my other tutorial how to installing them in this blog.
Ok, lets jump to the tutorial step.
- We assume that you have installed opencv and codeblocks on your computer. So ,we jump to the next step.
- Run Code::Blocks and select on the menu “Setting->Compiler and debugger” like image below.
- Next, you will see a dialog for Compiler and debugger settings like image below, on the “search directories” tab select “compiler” tab and add opencv include directory by click “Add” button on the bottom.
- Next, On the “search directories” tab select “linker” tab and add opencv library directory by click “Add” button on the bottom like image below.
- Next, still on a dialog for Compiler and debugger settings, select “Linker setting” tab and add opencv include file by click “Add” button on the bottom like image below.
- Create New project from menu “File->New->Project”, select “Console Application”, choose C++ project and give project name. Select “GNU GCC Compiler” and click “Finish” button.
- On the left panel expand folder “src” and then open main.cpp. On the code editor put this code bellow.
#include "stdio.h" #include "cv.h" #include "highgui.h" int main(int argc, char** argv) { IplImage *img = cvLoadImage("lena.jpg", CV_LOAD_IMAGE_COLOR); /* initialize font and add text */ CvFont font; cvInitFont(&font, CV_FONT_HERSHEY_SIMPLEX, 1.0, 1.0, 0, 1, CV_AA); cvPutText(img, "Hello World!", cvPoint(10, 50), &font, cvScalar(255, 255, 255, 0)); /* display the image */ cvNamedWindow("image", CV_WINDOW_AUTOSIZE); cvShowImage("image", img); cvWaitKey(0); cvDestroyWindow("image"); cvReleaseImage( &img ); return 0; } - Build and run project by press “F9”. (Note: you must put image file on the project folder first and then run project.)
- Then you will see result like image below. Congratulation you are successful integrate Code::Blocks and OpenCV. Have fun…
Tutorial Installing OpenCV based on Visual Studio binaries
Posted by on February 2, 2011
In this tutorial, we will learn step by step installation for OpenCV package based on Visual Studio compiler binaries. For OpenCV installation based on other compiler binaries such as MinGW, please see my other tutorial in “Tutorial Installing OpenCV from source based on MinGW compiler binaries”.
The latest version of OpenCV is 2.2.0 that support more library function for C++ language, but the principle of installation between old version and new one is same.
Ok, lets jump to installation step.
- Download OpenCV 2.1.0 binary package for visual studio 2008 in here or OpenCV2.2.0 for visual studio 2010 in here.
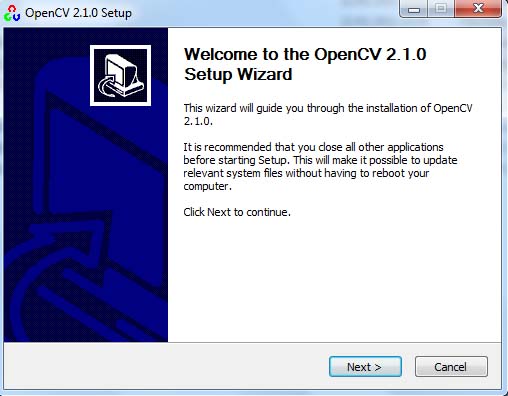
- Install it by double clicking on the file. Next, you will see a welcome setup dialog like image below, just click on “Next” button.
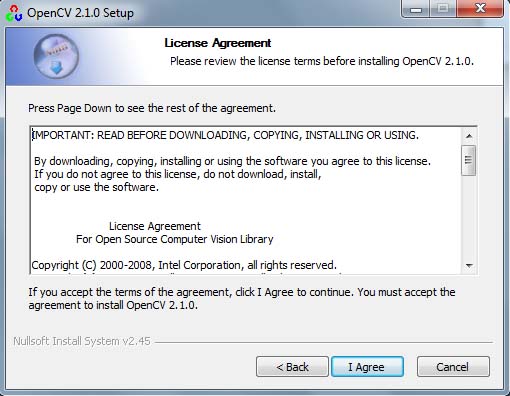
- On the next screen, you will see a license agreement dialog like image below. Click on “I Agree” button.
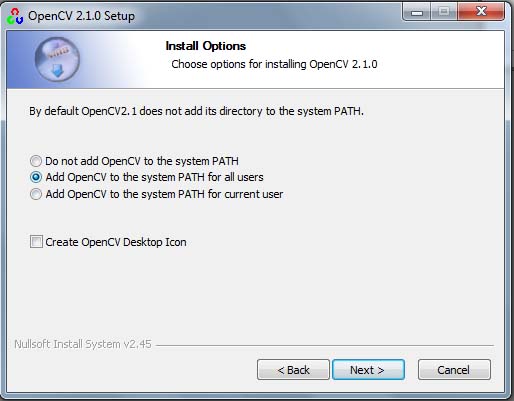
- On the next screen, you will see a system path dialog like image below. Choose “Add OpenCV to system path for all user” and then click “Next” button.
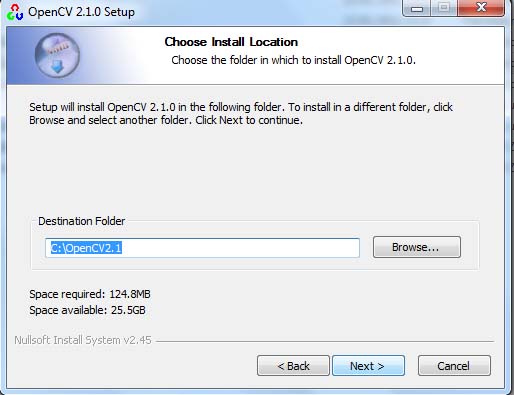
- On the next screen, you will see a dialog for choose location of installation like image below. In this tutorial we will use default location, you may change the installation location as you wish. After you choose installation location, then just click “Next” button.
- Next, you will see a dialog for start menu folder like image below. In this tutorial we will use default folder, you may change it as you wish. Then click “Next” button.
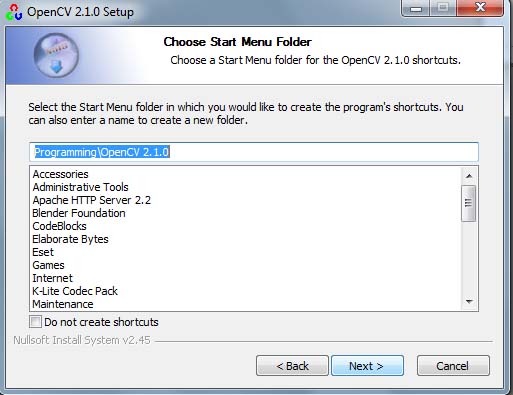
- Next, you will see a dialog for choose type component installation like image below. In this tutorial we will use “FULL” installation, you may change it as you wish. Then click “Install” button.
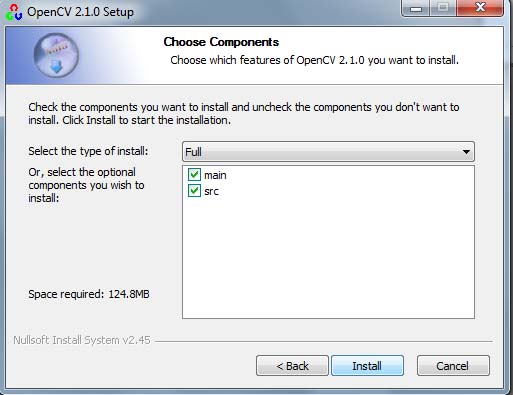
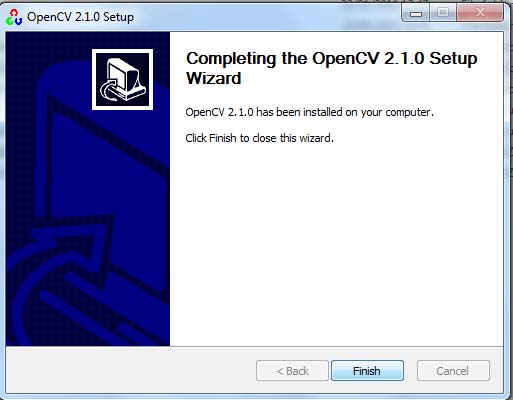
- Finally, you will see a information dialog for complete installation like image below. Then click “Finish” button.
What is OpenCV?
Posted by on February 2, 2011
OpenCV (Open Source Computer Vision) is a cross-platform (Windows, Linux, MacOS, freeBSD) library of programming functions that are widely used to support the project development of applications based on computer vision. OpenCV developed by Intel, which is free under BSD license for both academic and commercial use. OpenCV libraries contain more than 500 algorithms which are widely used in image and video processing.
Now, in its development is supported by researchers from robotics lab Willow Garage. OpenCV based on C / C + + which can be integrated with a variety of programming IDE editor like code:: blocks, Eclipse, Qt, DevCpp, and others also support the python programming language.
For more detailed information please visit the “OpenCV website” or “OpenCV Wiki” and for a tutorial how to integrate OpenCV with “visual editor IDE” as codeblocks, eclipse and qt please read my tutorials on this blog.
Tutorial installing Code::Blocks and MinGW individual package (Windows)
Posted by on February 1, 2011
In this tutorial we wil learn how to install and integrate Code::Blocks individual package (Exclude MinGW) with MinGW compiler.
Lets go to the tutorial step:
- Install MinGW compiler. There are two kinds of MinGW installer you can use.
- The first from mingw.org, where you must install MSYS after MingGW installed or you can online download installer from here.
- The second one is offline package installer from TDM-GCC. You can download it from here. See my Tutorial installing TDM-GCC (Windows).
- Download Code::Blocks individual package (Exclude MinGW) from official website codeblocks. Choose file installer for windows ” codeblocks-10.05-setup.exe “ (Latest version : Code::Blocks 10.05). You can downlond it directly from BerliOS or Sourceforge.net.
- Install Code::Blocks by double-clicking on the file and the next steps the same as my tutorial about “Tutorial Installing Code::Blocks and MinGW integrated package (Windows)”.
- Note, before you create new project you must change compiler setting by select toolbar menu “Setting->Compiler and debugger” and you will see a dialog like image below.
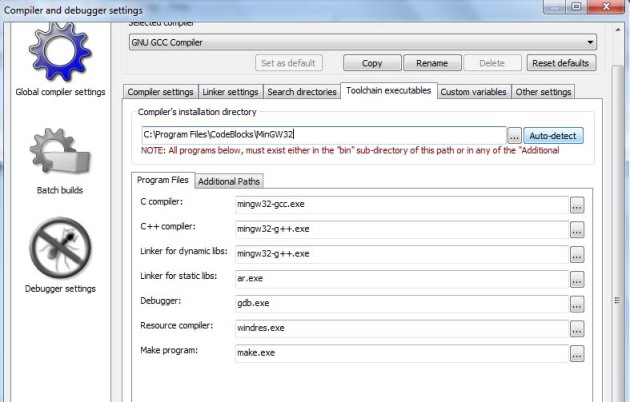 Select on tab “Toolchain executables” and click on “Auto-detect” button. Wait until auto-detect message appear like image below.
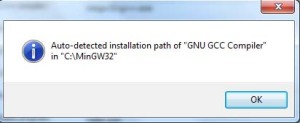 .Click “Ok” button on that message and click “Ok” button on a dialog “compiler and debugger setting”.
 - Create new project from menu “File->New->Project” and select “console application”. See my tutorial about “Tutorial Installing Code::Blocks and MinGW integrated package (Windows)”.
- Put this code on the “main.cpp”
#include <iostream> using namespace std; int main() { cout << "Hello world! This is my first program.." << endl; return 0; } - Compile the program by press “F9” and you will see the result like image below.
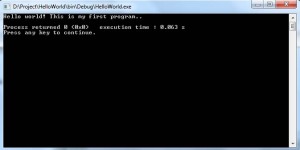 Congratulations you have successfully integrate Code::Blocks with MinGW….
Tutorial Installing TDM-GCC (Windows)
Posted by on February 1, 2011
TDM-GCC is free compiler package installation for windows 32/64 bit. It combines the most recent stable release of the GCC (GNU Compiler Collection) toolset with the free and open-source MinGW (Minimalist GNU for Windows) runtime APIs to create library for Microsoft Compiler and SDK platform. You can find more detailed information on the official website TDM-GCC.
Ok, lets we jump to the installation step.
- Download TDM-GCC from here. Select installation package compatible with your windows platform (32/64 bit). In this tutorial we use windows platform 32 bit. So we must select “tdm-gcc-4.5.1.exe”.
- After download complete you just simply double click on the file and then you will see a dialog setup option like image below. Click on “Create” button.
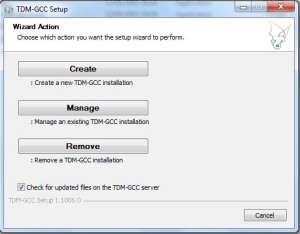
- On the next screen you will see a dialog to select type edition windows paltform (32/64 bit) like image below. Choose “MinGW/TDM (32-bit)” and then click on “Next” button.
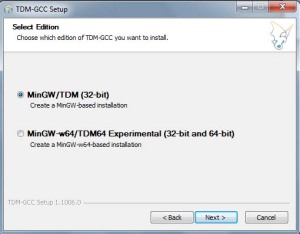
- On the next screen you will see a dialog to select directory installation like image below. In this tutorial we use default directory “C:\MinGW32” and then click “Next” button.
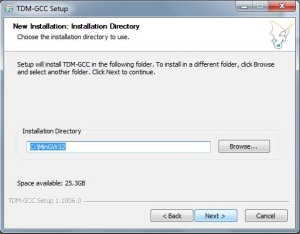
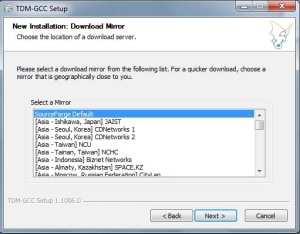
- And next we will see a dialog selection of dowload for update mirror like image below. Just leave the option and then click “Next” button.
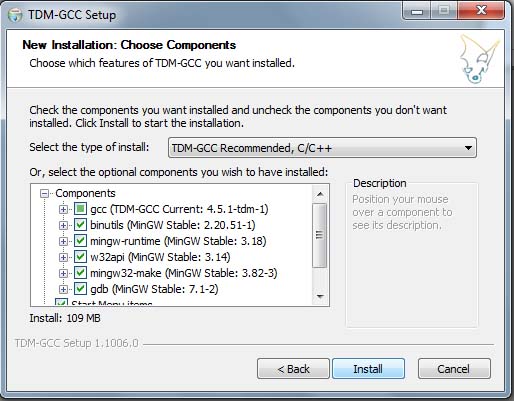
- On the next screen you will see a dialog to select type of installation like image below. Just leave it and then click on “Install” button.
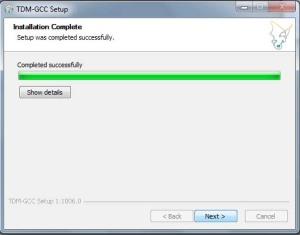
- Wait until the installation process is complete. Next, you will see a dialog complete installation and then click “Next” button like image below.
- Finally you will see a dialog information complete setup wizard and then just click “Finish” button.
Now, TDM-GCC is ready to use. If you want to create project base on this compiler you may choose a lot of Editor IDE such as Eclipse, Code::Blocks, DevC++..etc. See my other Tutorial how to integrate Code::Block and MinGW or Tutorial how to integrate Eclipse and MinGW…Good Luck
Tutorial Installing Code::Blocks and MinGW integrated package (Windows)
Posted by on February 1, 2011
There are two kinds of Code::Blocks installer from binary package :
- Code::Blocks individual package installer without MinGW/GCC include. (Where you must install MinGW/GCC and Code::Blocks separately). See my tutorial how to install its manualy.
- Code::Blocks integrated package installer with MinGW/GCC.
In this tutorial we will use the second installer package for windows platform because it is the easy way to use Code::Blocks with MinGW/GCC. Now just do the following steps:
- Download Code::Blocks and MinGW integrated binary package in here. Choose file installer for windows ” codeblocks-10.05mingw-setup.exe “ (Latest version : Code::Blocks 10.05). You can downlond it directly from BerliOS or Sourceforge.net.
- After you download it then you just double click on that file and you will see dialog welcome setup like the image below. Click on “Next” button.
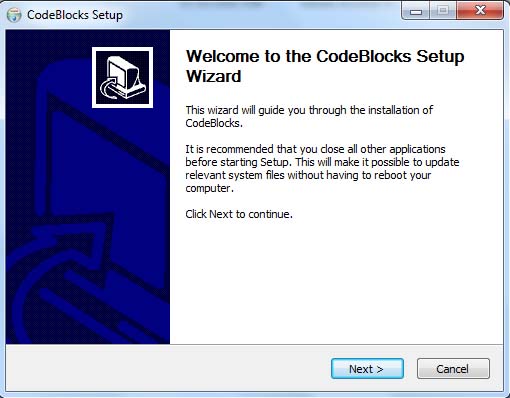
- Then a dialog license agreement will appear like screen shoot image below. Click on “I Agree” button.
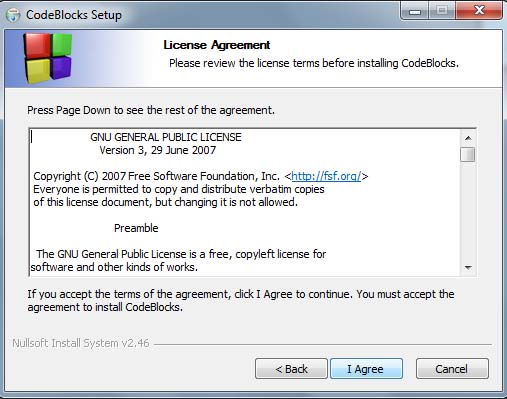
- A selection type installation dialog will appear like screen shoot image below. In this tutorial we do not make any changes just click the “Next” button.
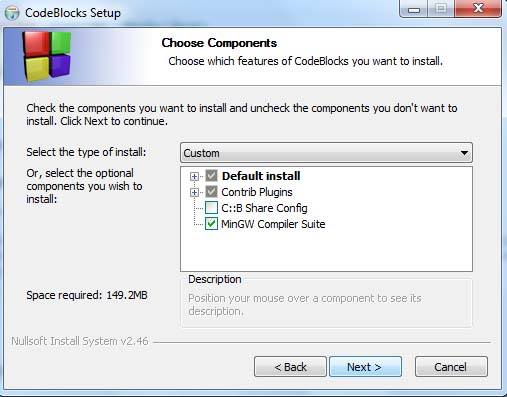
- A choose location of installation dialog will appear like image below. In this tutorial we will use default location. You may choose a different installation location of installation as you wish. Then just click on “Install” button.
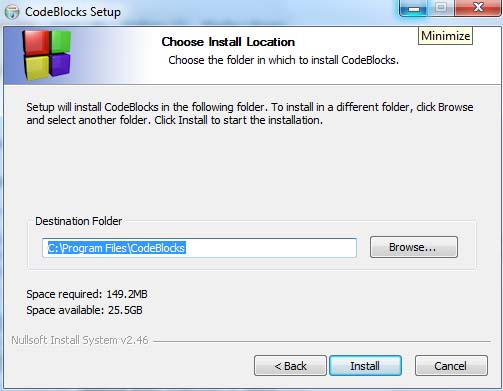
- Wait until the installation is complete.
- After the installation is complete then you will see a dialog option to run Code:: Blocks now or later like image below. Select the “Yes” button to run Code::Blocks now.
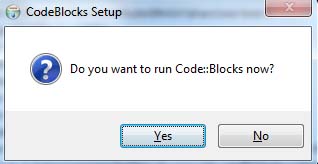
- Then you will see visual IDE of Code::Blocks like image below.
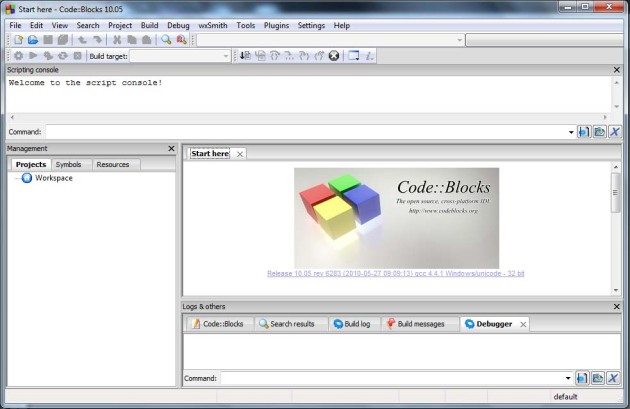
- Installation of Code::Blocks and MinGW is finished. Then to check it we will make a sample program “HelloWord”.
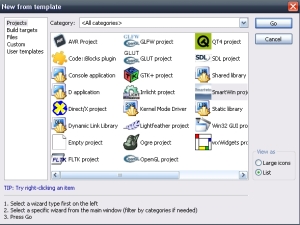
- Select on menu File->New->Project..Now you will see a project choose dialog like image below and for this tutorial select “Console Application” on the top right corner. Then click on “Go” button or just double click on “Console Application” .
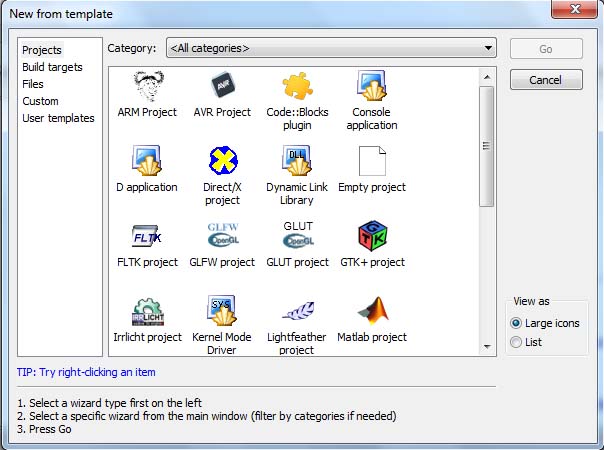
- Now you will see a dialog cosole application like image below. In this tutorial we do not make any changes just click the “Next” button.
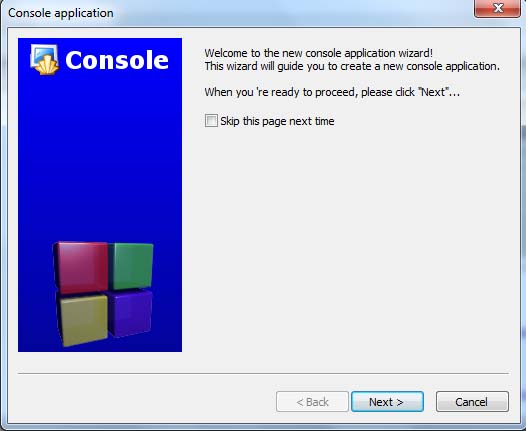
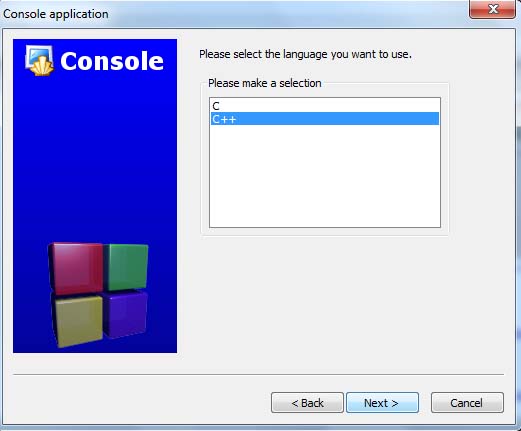
- On the next screen you will see a dialog of language selection like image below. In this tutorial we choose “C++” and then click the “Next” button.
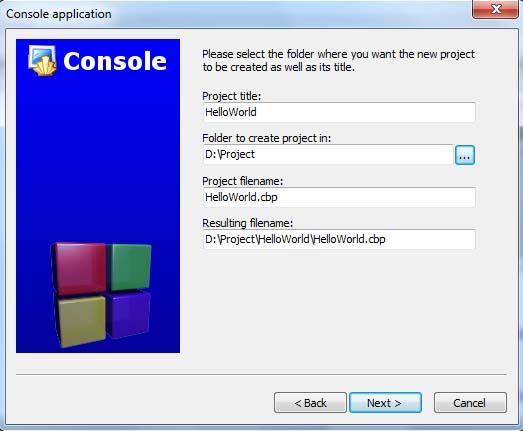
- On the next screen you will see a dialog of select project name and folder for workspace like image below. After finished click the “Next” button.
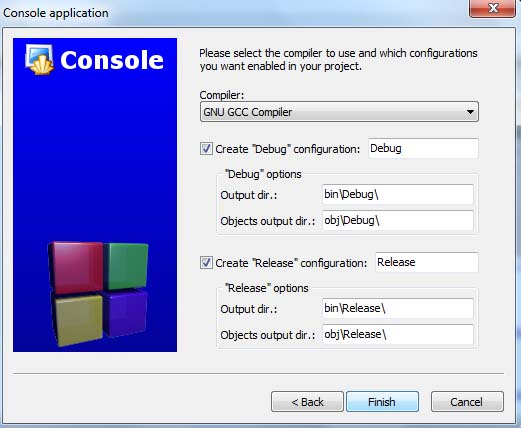
- Then you will see a dialog for select type of compiler like image below. n this tutorial we do not make any changes just click the “Finish” button.
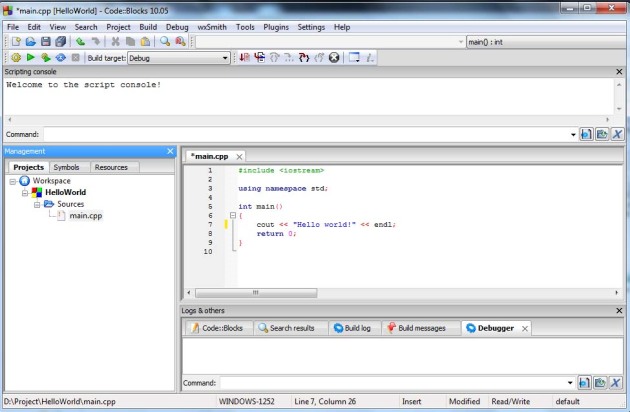
- On the next screen you will see Code::Blocks IDE like image below. Choose left screen on “Management” panel and click “Project” tab. Expand on “src” folder and double click on file “main.cpp” and you will see listing code on the middle of editor.
- Try to change listing code on the editor with this..
#include <iostream> using namespace std; int main() { cout << "Hello world! This is my first program.." << endl; return 0; } - Then build and run program by select menu “Build->Build and Run” or just press “F9” button. You will see the result like image below. Congratulations you are ready to program with Code::Blocks. Have fun with it….

What is Code::Blocks ?
Posted by on January 31, 2011
Code::Blocks is a free open source IDE (Integrated Development Environment) for C/C++ programming code that can be run on cross platform (Windows, Linux, and Mac OS X). It is support multiple compilers, including MinGW / GCC, Digital Mars, Microsoft Visual C++, Borland C++, Watcom, LCC and the Intel C++ compiler.
The IDE was designed for the C++ language but also support for other compilers languages, including GNU Fortran, Digital Mars D and GNU GDC. If you ever seen Microsoft Visual C++ IDE before, this Code::Blocks IDE is similar like that. Interest and want to learn about Code::Blocks ? Absolutely yes…look at screen shoot below you can built many project with this IDE.
You can find more detail information about Code::Blocks in the Code::Blocks Website or Official Wiki Code::Blocks.
If you interested and want to try Code::Blocks IDE see my tutorial Code::Blocks in this blog.

